In this section, let’s see how to label video data.
All the steps are similar to the image data labeling steps, except the template used for video data labeling. First, we will create the project in Label Studio and then import the video data files and select the appropriate template. Finally, we apply the labels to the video.
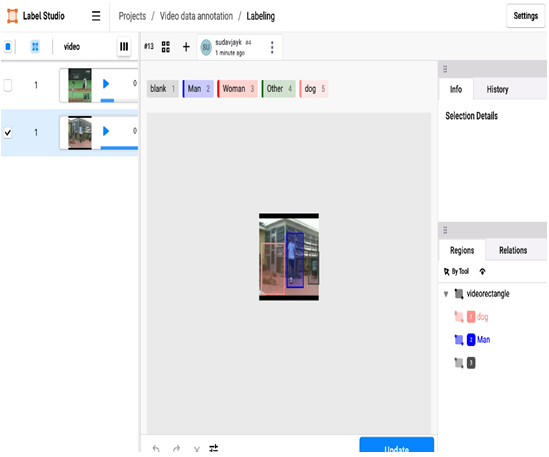
Now, let’s add annotations to the project. Here, we are adding dog and Man labels manually for this exercise. Now, we go to the video annotation project and start labeling the video in Label Studio. We have created bounding boxes for the dog and Man objects shown in this video. We apply these labels to the video frames.

Figure 12.36 – Video data labeling
We have now seen how to label video data in Label Studio. All the steps are similar for image data labeling, text data labeling, and video data labeling, except for the label template. These labels can be exported from Label Studio and saved to the local computer. From there, a dataset can be created using local files in Azure Blob storage. This dataset can be used in the Azure Machine Learning pipeline for training the ML models.
As well as Label Studio, there are many other open source Python libraries available for data labeling. Now, let’s see about another Python-based open source labeling tool, pyOpenAnnotate. The choice of tool depends on the availability of skilled resources, the volume of the data, and the format of the data.
pyOpenAnnotate
pyOpenAnnotate is an open source Python-based annotation tool that automates the image annotation pipeline using OpenCV. It is particularly well-suited for annotating simple datasets, such as images with plain backgrounds or infrared images. pyOpenAnnotate is a single-class automated annotation tool that can help you label and annotate images and videos using computer vision techniques. It is built by harnessing the power of OpenCV. You can check out the Python library documentation to understand how pyOpenAnnotate has been designed: https://pypi.org/project/pyOpenAnnotate/.
You can load your images in a directory and then run the following command to start labeling the bounding boxes for your images:
!annotate –img /path/to/directory/Images
The following image is available in the book’s GitHub path for this chapter.
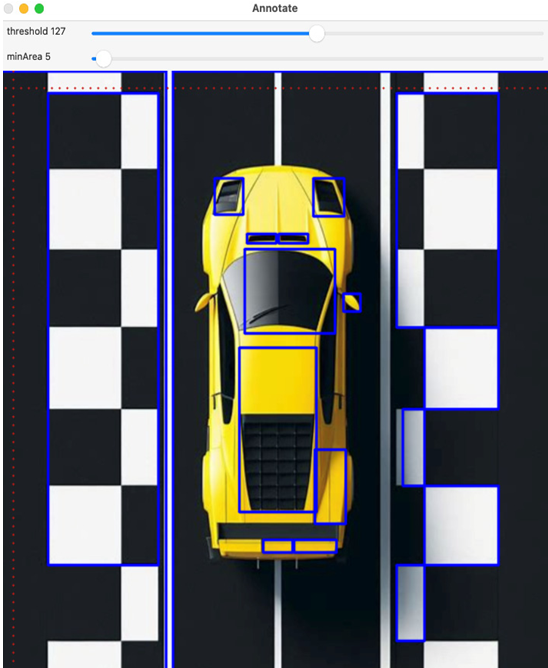
You can replace the directory path with your own dataset path. This will prompt the tool to label the objects in your image and you can drag and drop the bounding boxes around the objects (blue-colored bounding boxes in the following figure):

Figure 12.37 – Bounding boxes on car image (created by the author of this book using DALL-E)
Similarly, we can annotate videos using this pyOpenAnnotate tool. We can extract the frames for the video as shown in Chapter 8, and then provide the path of that video frame for drawing bounding boxes to the video frames. Now, let’s see another popular tool to label the image data, CVAT.
